Pump
One of the main components of our system is the pump. The pump is essential because water needs to be delivered to the plant from the water storage tank.
Initial Pump:
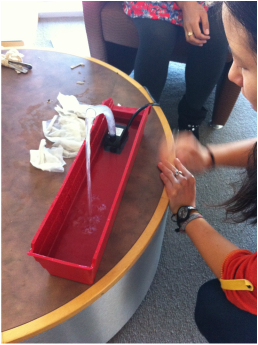
Our first idea was to buy a small fountain pump online. When we received this pump and plugged it in, we were pleased that it moved water and it seemed to work well. Fairly quickly however, we realized that using a premade pump was more difficult than we had anticipated. First, we needed to be able to control the pump with an arduino, which would have required using a power switch tail for the arduino. Second, the voltage required for the electrical pump was not ideal and we would have had to do more somewhat sketchy electrical work. Having to do many electrical modifications and working around water made us nervous, and so we decided to explore other options.
Peristaltic Pump:
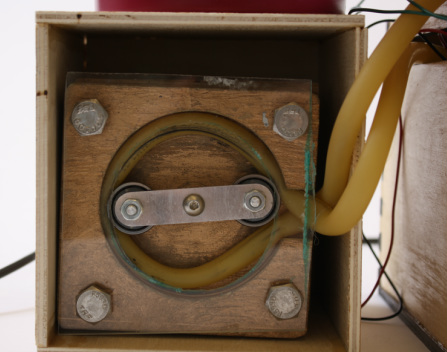
Our next, and final, idea was to make our own peristaltic pump. A peristaltic pump uses tubing that is in a circular housing, and there are rollers attached to a motor that compresses the tubing, which moves the water. Using this style of pump would allow us to have easy control over the pump using an arduino and would give us more mechanical design and building experience.
Rollers:
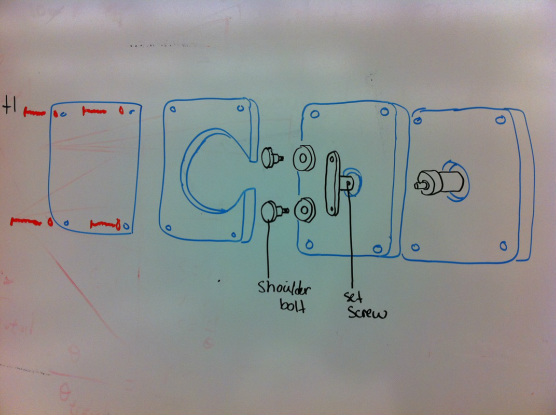
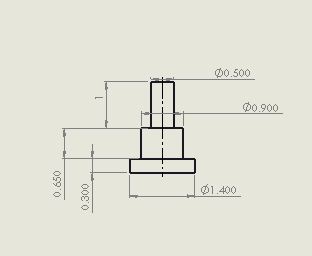
We began working on the pump design from the top down. We cut holes in two pieces of wood to hold the tubing and found a small DC motor. Next, we realized that we had to design rollers to compress the tubing. We decided to create an attachment for the motor that was held on with a set screw that would hold two bearings with shoulder bolts. We had these pieces machined and did initial testing.
Initial Problems:
- Tubing: The first major problem that we ran into with the pump was that the tubing that we had been using was too small and too stiff. After a trip to harveys, we found 1/4'' latex tubing that was wider in diameter and was easily compressed.
- Motor: Our motor was not powerful enough to move at first, and it kept stalling. We discovered that we weren't powering it correctly so we purchased a new power supply.
- Housing: We also realized that we needed to lock the motor in place so that it would twist while it was running. We designed a motor housing to fix this problem.
Pump Housing:
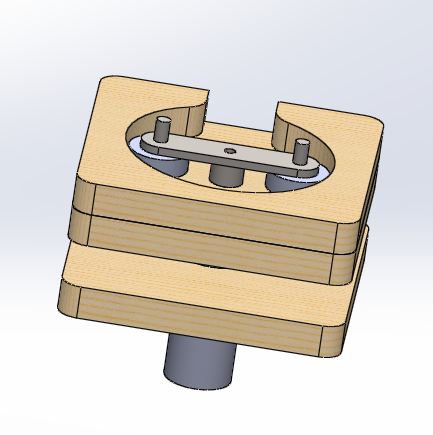
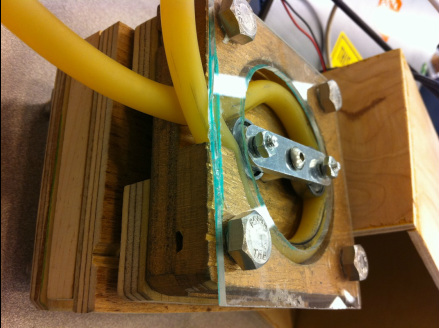
In order to lock the motor in place, we had to build a housing for the pump. Our housing consisted of 7 layers
In order to lock the motor in place, we had to build a housing for the pump. Our housing consisted of 7 layers
- Plastic covering to hold the tubing in place
- Wood square with a large hole and two slits cut out for the tubing to rest against
- Wood square for the tubing to rest on top with a small hole for the motor shaft
- Wood square with a hole and a slit to go around the motor and provide us access to the set screw
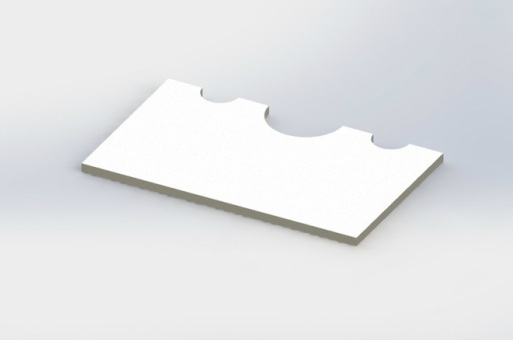
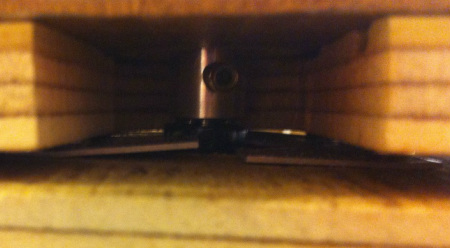
- Wood square with two metal plates (shown below) to prevent the motor from twisting
- Wooden square with a hole for the motor to go through
- Wooden square with a hole that is exactly the size of the bottom part of the motor so that the motor wont slip out
With all of these adjustments in place, we were able to get the pump working consistently and integrated it with our electrical and software system.

